I’ve come to realize that I do better on certain social media platforms and my blog is just not one of them. Given my health issues creating blog posts requires too much energy to keep up with regularly and I need that energy to actually work on orders. So with that said, I am not going to be updating here anymore. I will continue to keep updating on Facebook, Instagram, and probably a few others. Please check out the link below and follow me there. Thank you so much for understanding!
Shop Reboot!
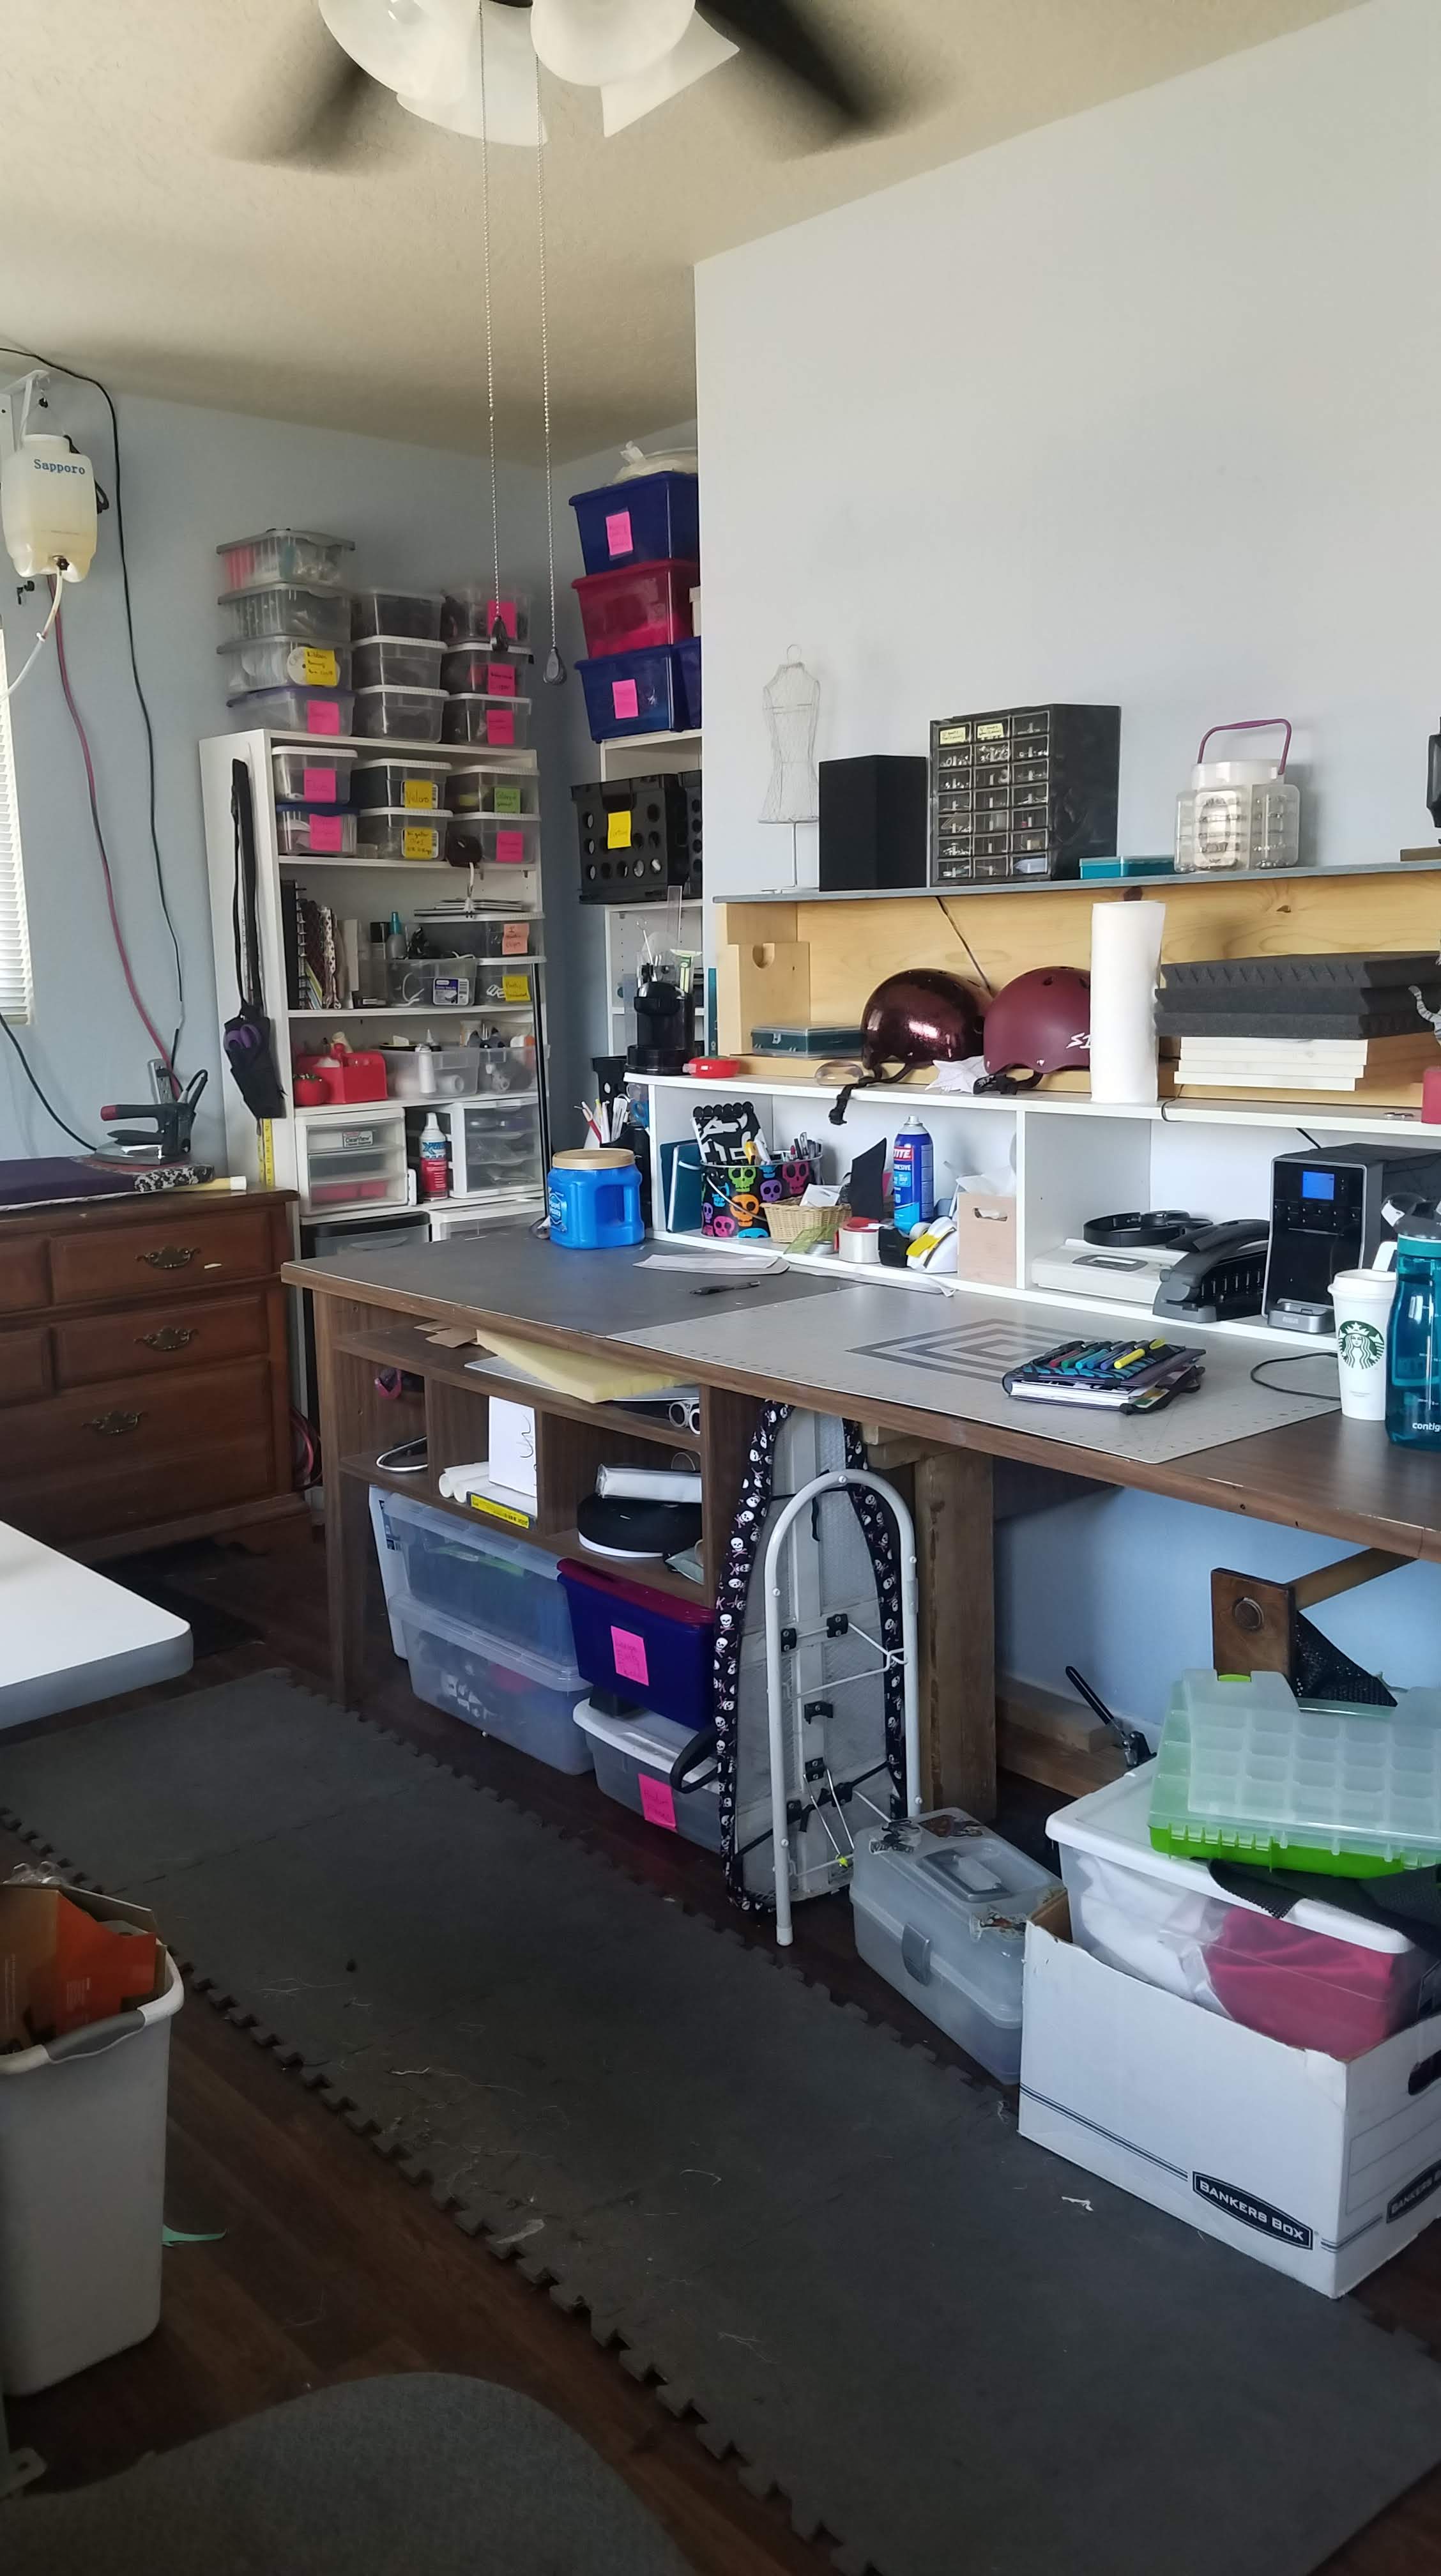
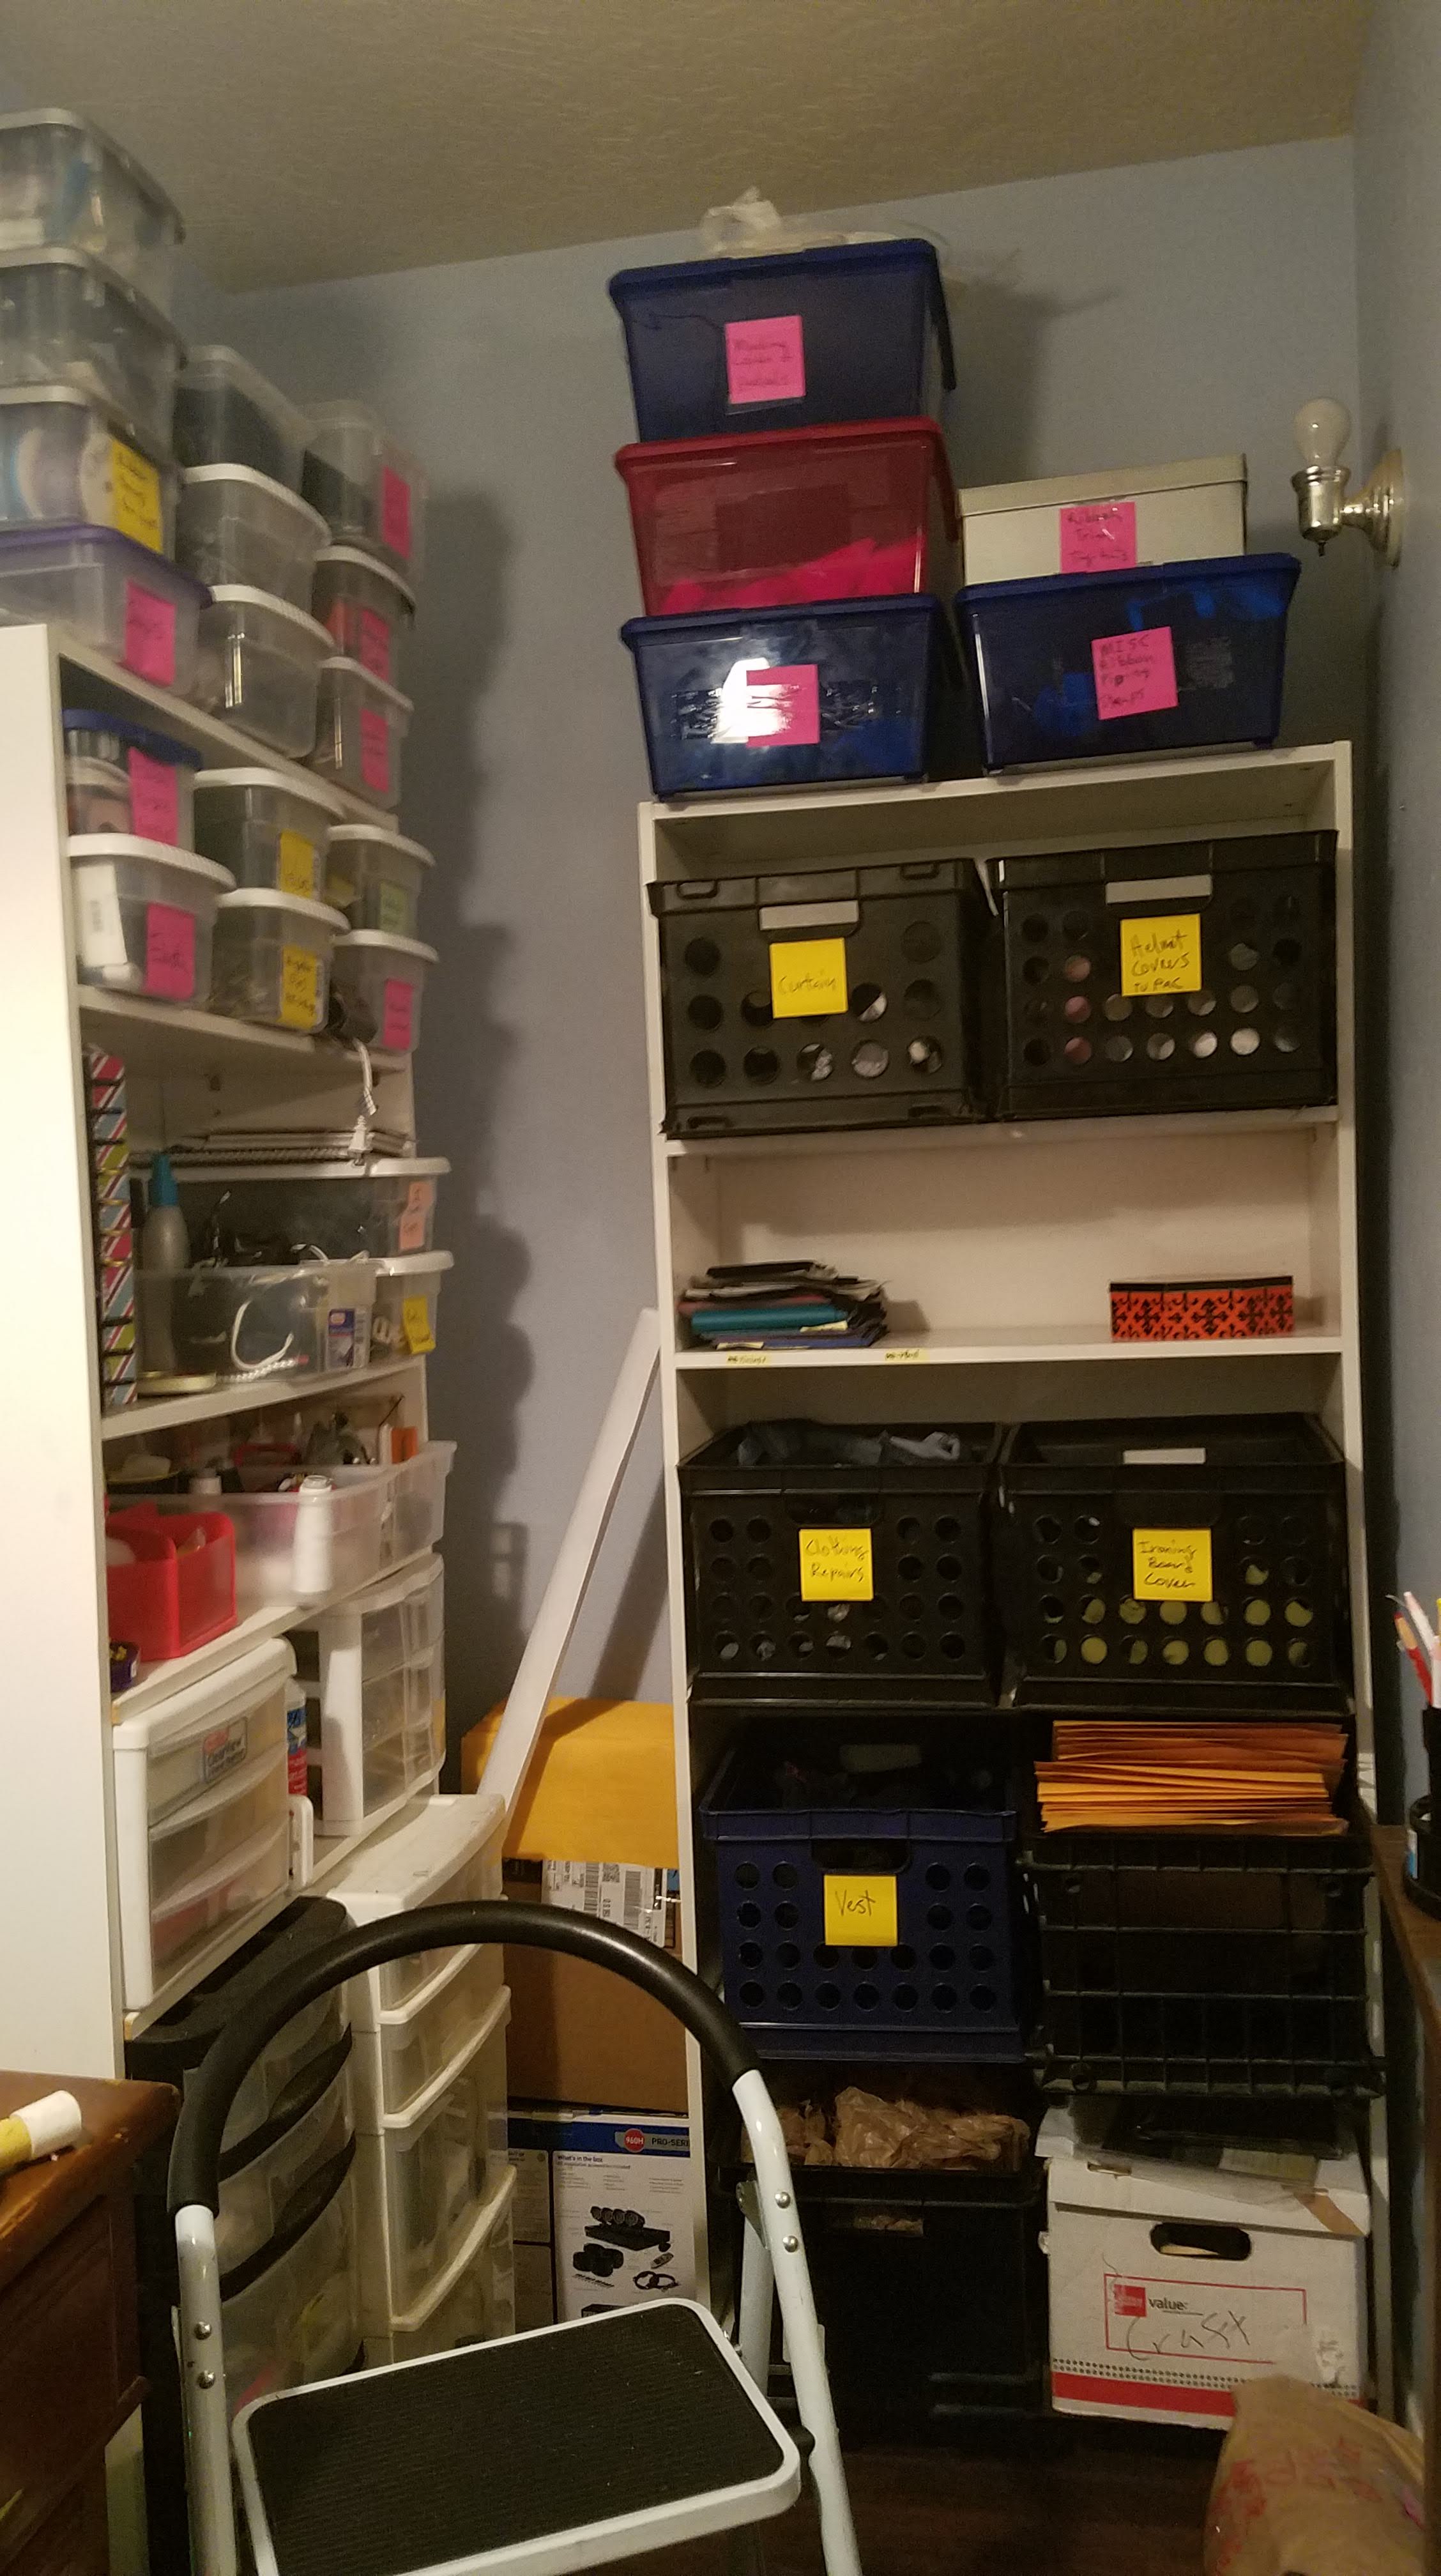
Ever since I moved into my first home, I have been struggling to make the best of the lack of space I suddenly had. I downsized my shop from the 500sqft commercial space to a 200sqft (approx) bedroom. Not to mention downsizing the rest of my life too. My whole house is only 700sqft but it’s mine! 😀
Anyway, when I first moved my shop it I set it up so the giant cutting table was the central focus. Because that was the way I had it before in my large shop. So this is what I continued with.

I got tired of having to climb over my chairs on the left side of the table and constantly hitting my hip on the corner of the table when walking around it. For months I was frustrated and mentally re-organizing my shop room when finally I got tired of thinking about it and just started rearranging things until it felt right. I started purging things while re-organizing and ended up with more room than I thought I would have. I love my new layout, it makes me feel like being in my shop more!


Variety is the spice of life!
Roses are red…
Have a client who has had me putting floral embroidery on a lot of ready-made clothes lately. This is a rose design I’m making for her. I couldn’t find a built-in rose file in my embroidery software. It comes with so many pre-made designs that I am really surprised it didn’t have a basic rose. I found this embroidery design picture of a full rose and re-digitized it into the different parts, the rose head, the stems, and the leaves.
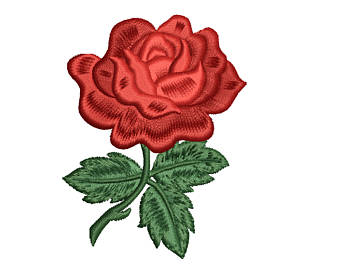
I liked the way the shadowing in the rose is created by the stitch design. The stitch type is a Satin Special. It’s used for pieces that are too wide for a satin stitch to look good or stitch out correctly. It creates one or two stitches across the width of the design and gives it those dimples.
This is how my rose came out. I did it with only one color to save some time embroidering it.

After creating the head of the rose, I took the vines off the original picture and played around with some different sized roses. I ended up adding more thorns and changing the leave directions to make it a bit more interesting.

I’m still not finished with the designs. I’ll probably make a separate, just vines, design so that way I can place some vines on the garment near or connecting two different designs.
Moving time again
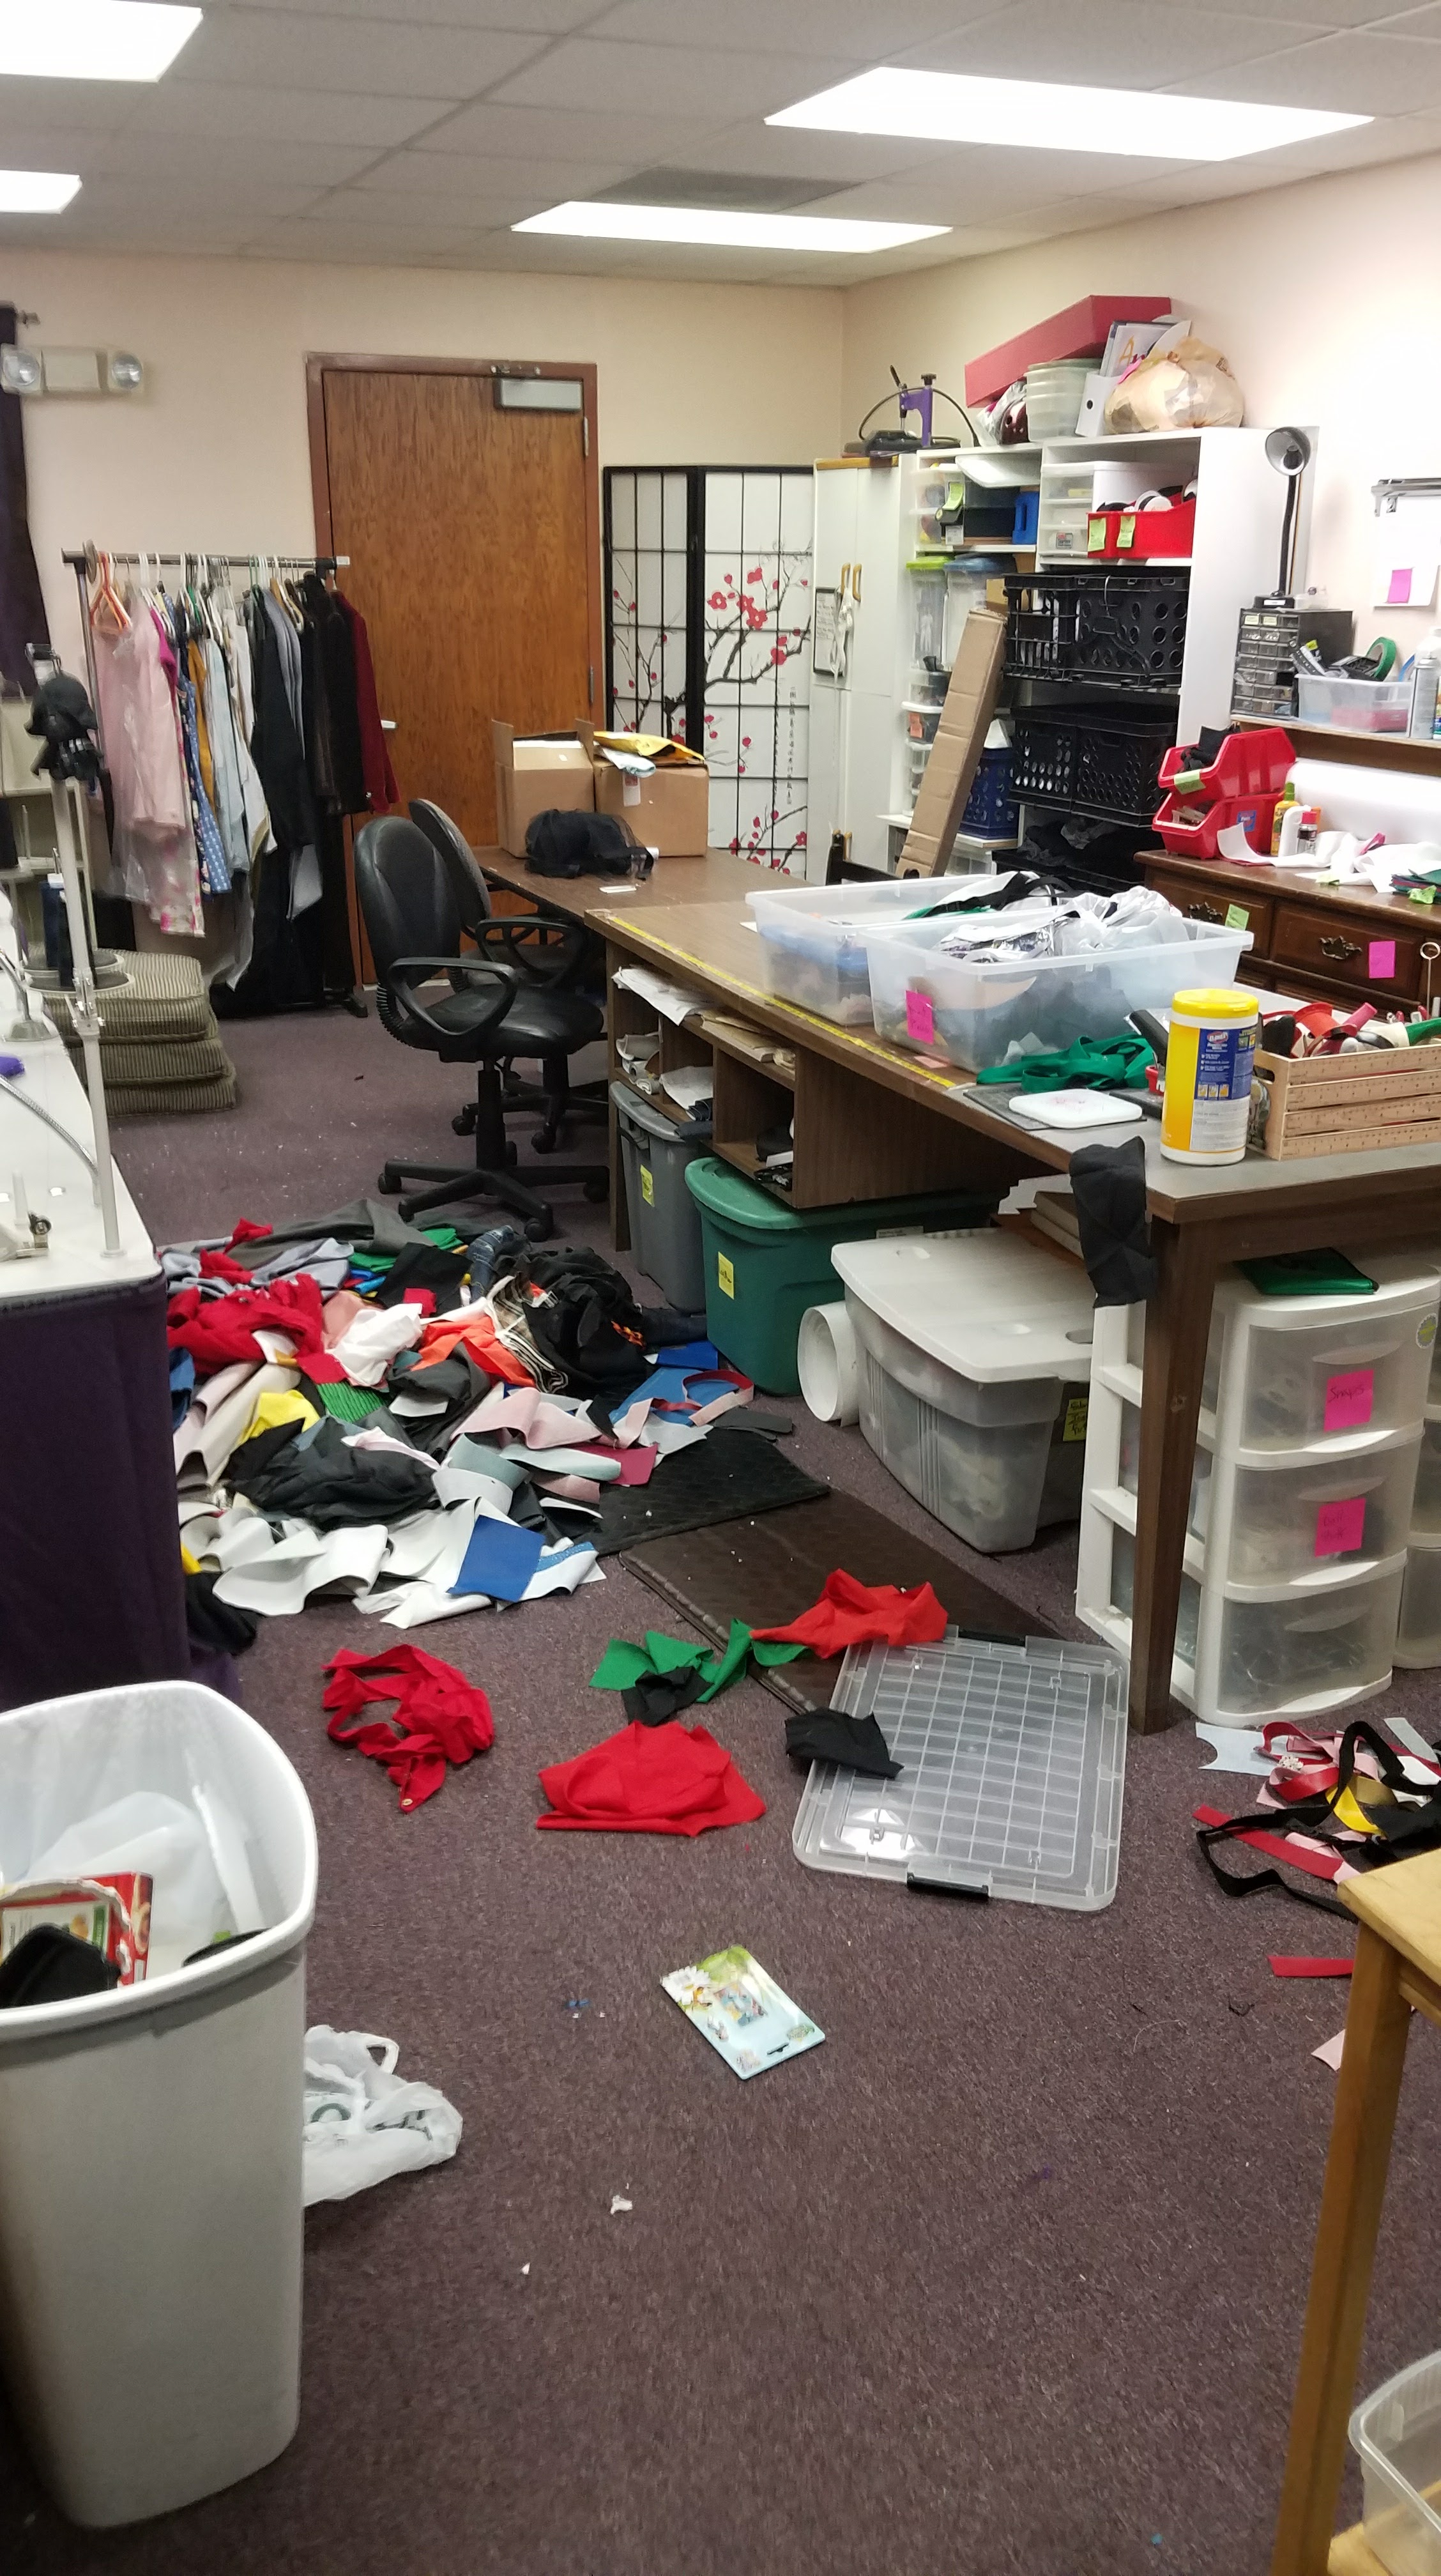
I’m moving my shop again. It’s gone from one machine on a table in my living room to the master bedroom of a different house. To the dining area of that house. To the whole bedroom of an apartment. Then into the living room of that apartment. Then into the one side a two car garage. Then I finally got a 500 square foot commercial space and that’s where my shop has lived for almost two years now! I’m really proud of my little shop but it’s time to relocate once again! This time back into my home. My new location will have a master addition that has outdoor access so I can keep my shop and my home separate. I’m super excited about it but it’s going to be a LOT of work to get everything ready to move. I have to go from 500sqft to about 200sqft again. My house closes on January 2nd so I have one month to downsize and pack up both my shop and my current home and keep up with the Christmas rush! It’s going to be a crazy month! Wish me luck!
Here are some progress pictures of the shop move.

Being a skilled tradesman is hard
This weeks collection of jobs and customers has been a mixed bag. I love doing contract sewing work, it’s varied, never boring, and not repetitious. Every project is as unique as the customer who brings it to me. However, the customers are not always the best people to deal with. Anyone who has worked in customer service understands the plight of dealing with difficult or ignorant people. For me, sewing for other seamstresses is the most stressful thing. When you sew for another seamstress that you just met, you don’t know her skill level or her perfectionism level. The way she sews is most likely different from the way I sew. This week I’ve had two seamstresses come to me with projects. One who understands and one who didn’t see the value in my pricing.
In general, whether they are a seamstress or not, I will come across customers that do not understand why getting custom clothing or a custom project made costs so much money. This is a point of contention for me because this is my life, sewing is my business, my hobby, my love, my passion, my reason for living, and my means of making a living. It hurts my soul when someone comes at me like I’m overpriced when I charging less than anyone else in my field or area. Mind you I do charge enough to cover all costs and make a profit, which is what you do in business. However, there are very few professional seamstresses in Mesa, AZ in general. Most of them only do alterations. I do a little of everything. Alterations, custom clothing, costumes, home decor, prototypes, accessories, embroidery, leather work, and much more. My businesses’ tag line is “If it can be sewn, we can sew it” for a reason and trust me I’ve sewn some weird things. My favorite is still the AstroTruf Dog Bed.
All that to say that I am not Wal-mart, I am not an overseas mass-market manufacturer, I am an artisan, a tradesman with a unique and finely honed skill. The price you’re paying for me to make something is not for the thing itself, it’s for me to make. You’re paying for a service that took that person years and years of work and study and labor to earn the right to charge money for and to call themselves a professional. Do not undermine that by thinking that getting anything custom made should cost what you would spend in the store for it!
Sorry for the rant but I have had a few of these kinds of customers this week and it makes my heart hurt when people treat what I do as something unnecessarily overpriced. It would be one thing if they were like “Oh wow, I didn’t realize how much that would cost, I just can’t afford it” but no these customers were like “I’m not paying that much for an XYZ, that’s ridiculous!”. There is a huge difference.
Custom anything is expensive because you’re paying for a skilled trade.
*end rant*
Life happens when you least expect it
Sometimes you just can’t win. I haven’t had a chance to blog here in a while because for the last month I’ve been battling illnesses. First a three week round of full-on bronchitis, then a week of the worse stomach flu I’ve ever had in my whole life. It took me almost the last two weeks to fully recover from the stomach flu. It was pretty epic. Now I’m finally feeling normal again, well normal for me. So I will be getting back to posting weekly again. I’m excited to share some of the interesting projects I’ve worked on recently.
Tattoo Princesses
I’ve said this before, but I love the creative jobs I get. The not so normal alterations and projects. This came from one of my Roller Derby League mates. She asked me to take this cute purse she had and use it to create a panel on her denim vest. She’s kind of punk so it figures the purse fabric is Disney princesses in Tattoo pin-up style.
Here is the purse fabric:


The cuteness of the fabric alone made this project so much fun to work with.
The trickiest part was making a pattern for the back shoulders of the jacket. At first, I had it laying flat on my table and I was just going to pin some paper to it and trace it out as best I could. Then I noticed my Hoop Master shirt board and had a great idea. Putting it on the shirt board made it so much easier to work with the jacket.

No shirt board

On Shirt board
Then I got started drafting a quick pattern. In retrospect, I should have taken a little more time to make the pattern symmetrical because it came out a little off but I already cut the fabric so I couldn’t go back.

Pinned some paper to the jacket and started tracing.


Finished Pattern
The trick to this was trying to position the pattern so that I could get the most princesses in the frame. Also, I made sure that her favorite princess, Belle, was very visible.

Positioning the pattern

Finally sewing it onto the jacket was probably the easiest part. I didn’t give myself a seam allowance but did a serged edges instead. Then used a zig-zag stitch to secure it to the jacket because the fabric was kind of stretchy.

All done!

As an extra thing, I decided it would be fun to make a patch from one of the other Belle’s on the fabric since that was her favorite. I thought about using my embroidery machine but I had already cut out the Belle, so lining up stitching would have been a nightmare. Instead, I opted to create it manually with a zig-zag on my home machine. I did it just like I would have on the embroidery machine, I used spray adhesive to secure the fabric to some no-show mesh stabilizer and some thick cut-away stabilizer. Then sewed a basting stitch an eight of an inch from the edge all the way around the patch. Then I cut off the stabilizer and used spray adhesive to attach the patch to some Badge Master stabilizer. Then zig-zagged all the way around the edge, making sure that the right most needle position was just over the edge of the fabric. Looking back I really should have used embroidery thread but I didn’t even thick of it until afterward. It still came out awesome. There were a few spots where the fabric was showing through so I used a black sharpie to color it in.

Attacked fabric to main stabilizer

Stitched and cut out

Atatched to Badge Master

Stitched zig-zagged edge

Some of the fabric showing

After I colored it with sharpie

All done!
She still has fabric left so I told her if she wanted I could make more patches from the other princesses. This was a super fun project! It gives me ideas for some clothes of my own I can spruce up!
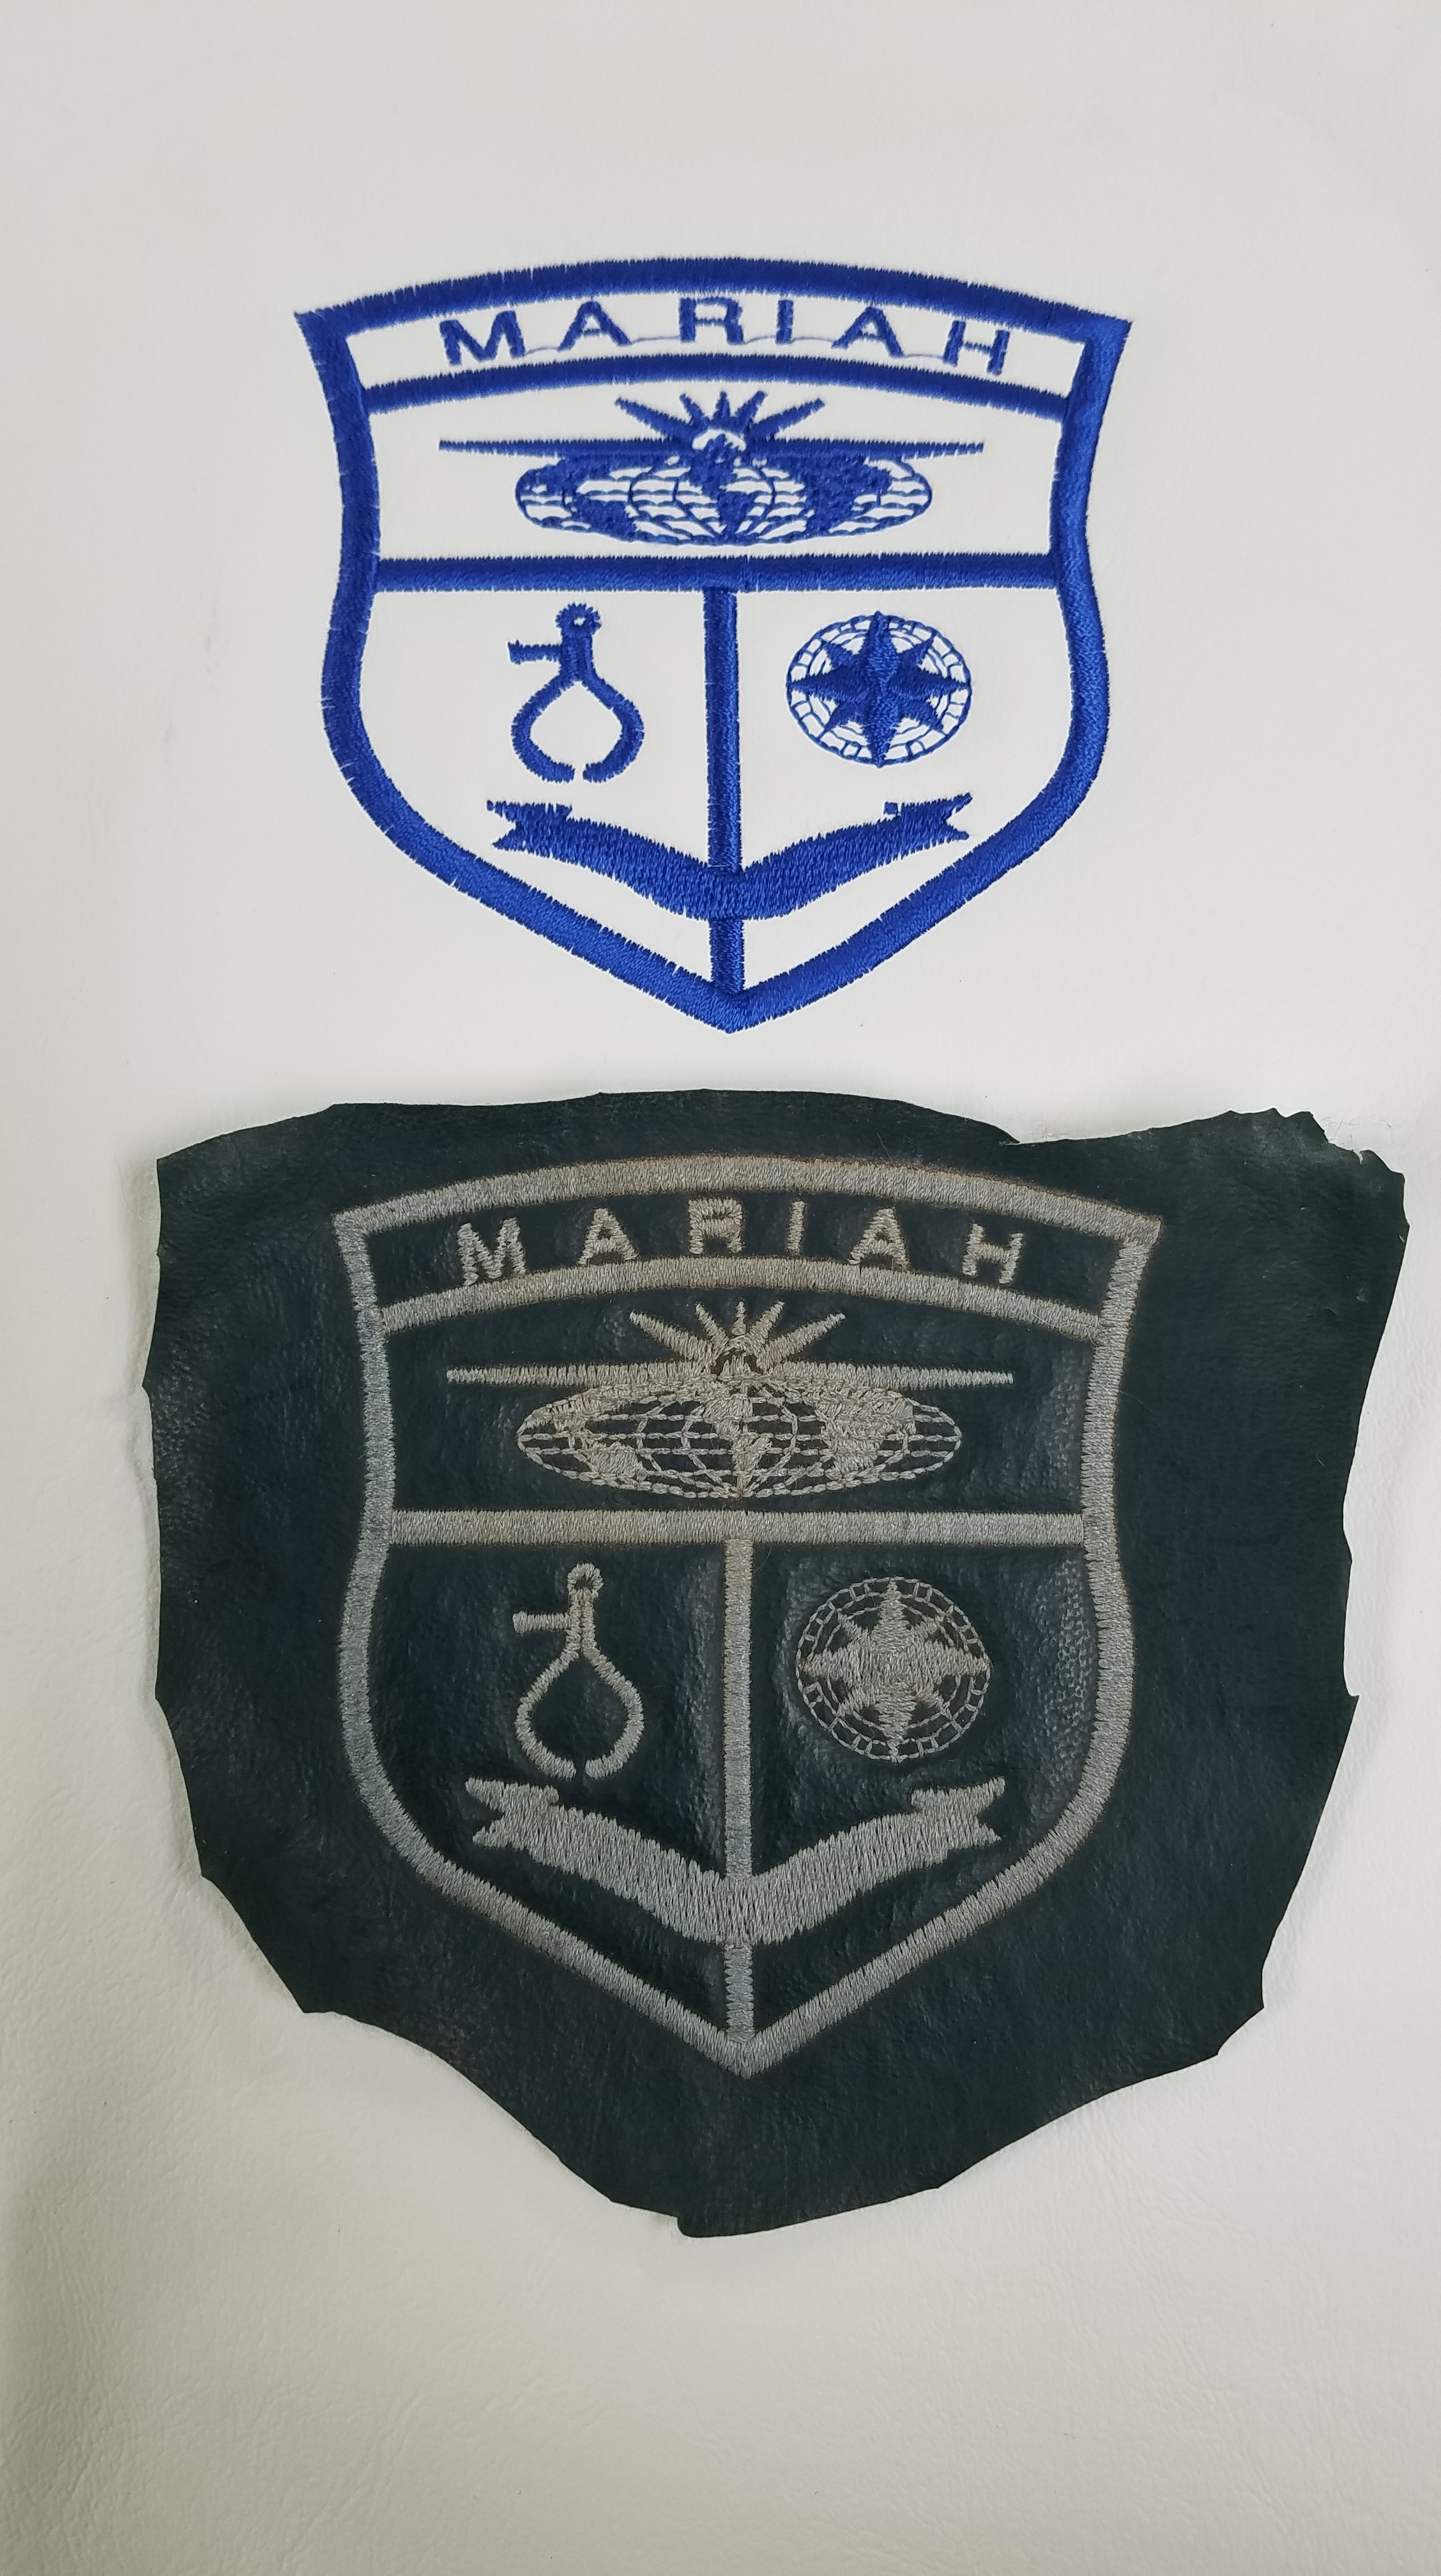
Copying Embroidery
Sometimes clients don’t have the original image file for a design. In this case, he had the original embroidery to work from. I just took a picture of the design and measured the dimensions and digitized it from there. It was a little tricky because the stitching was distorted from wear and tear and faded. I think it came out pretty good for being a copy of stitches. I think the size could use some tweaking though. I think it came out too wide.

When in doubt, make it work however you can
Most of what I love about my business are the interesting challenges that my clients provide me. Some of my favorites include sewing things out of the ordinary, like the AstroTurf dog bed that I make last year. Some others have been requests for embroidery on things that weren’t necessarily made to be embroidered on. Such as this car dash cover. Not only was the piece itself daunting but the embroidery they wanted on it was rather complex. This was for one of my regular clients. He does boat and auto upholstery and now offers his clients custom embroidery because he knows me. We’ve been working together intermittently for a few years now. I always welcome his projects because they challenge my sewing and embroidery skills. These one-time creative projects are the best part of my business. If I had to sew the same thing all day I would probably loose my mind.
So here is the embroidery project I had this week. This is the finished piece all ready to go. It is the dash or some cover for part of a vehicle. 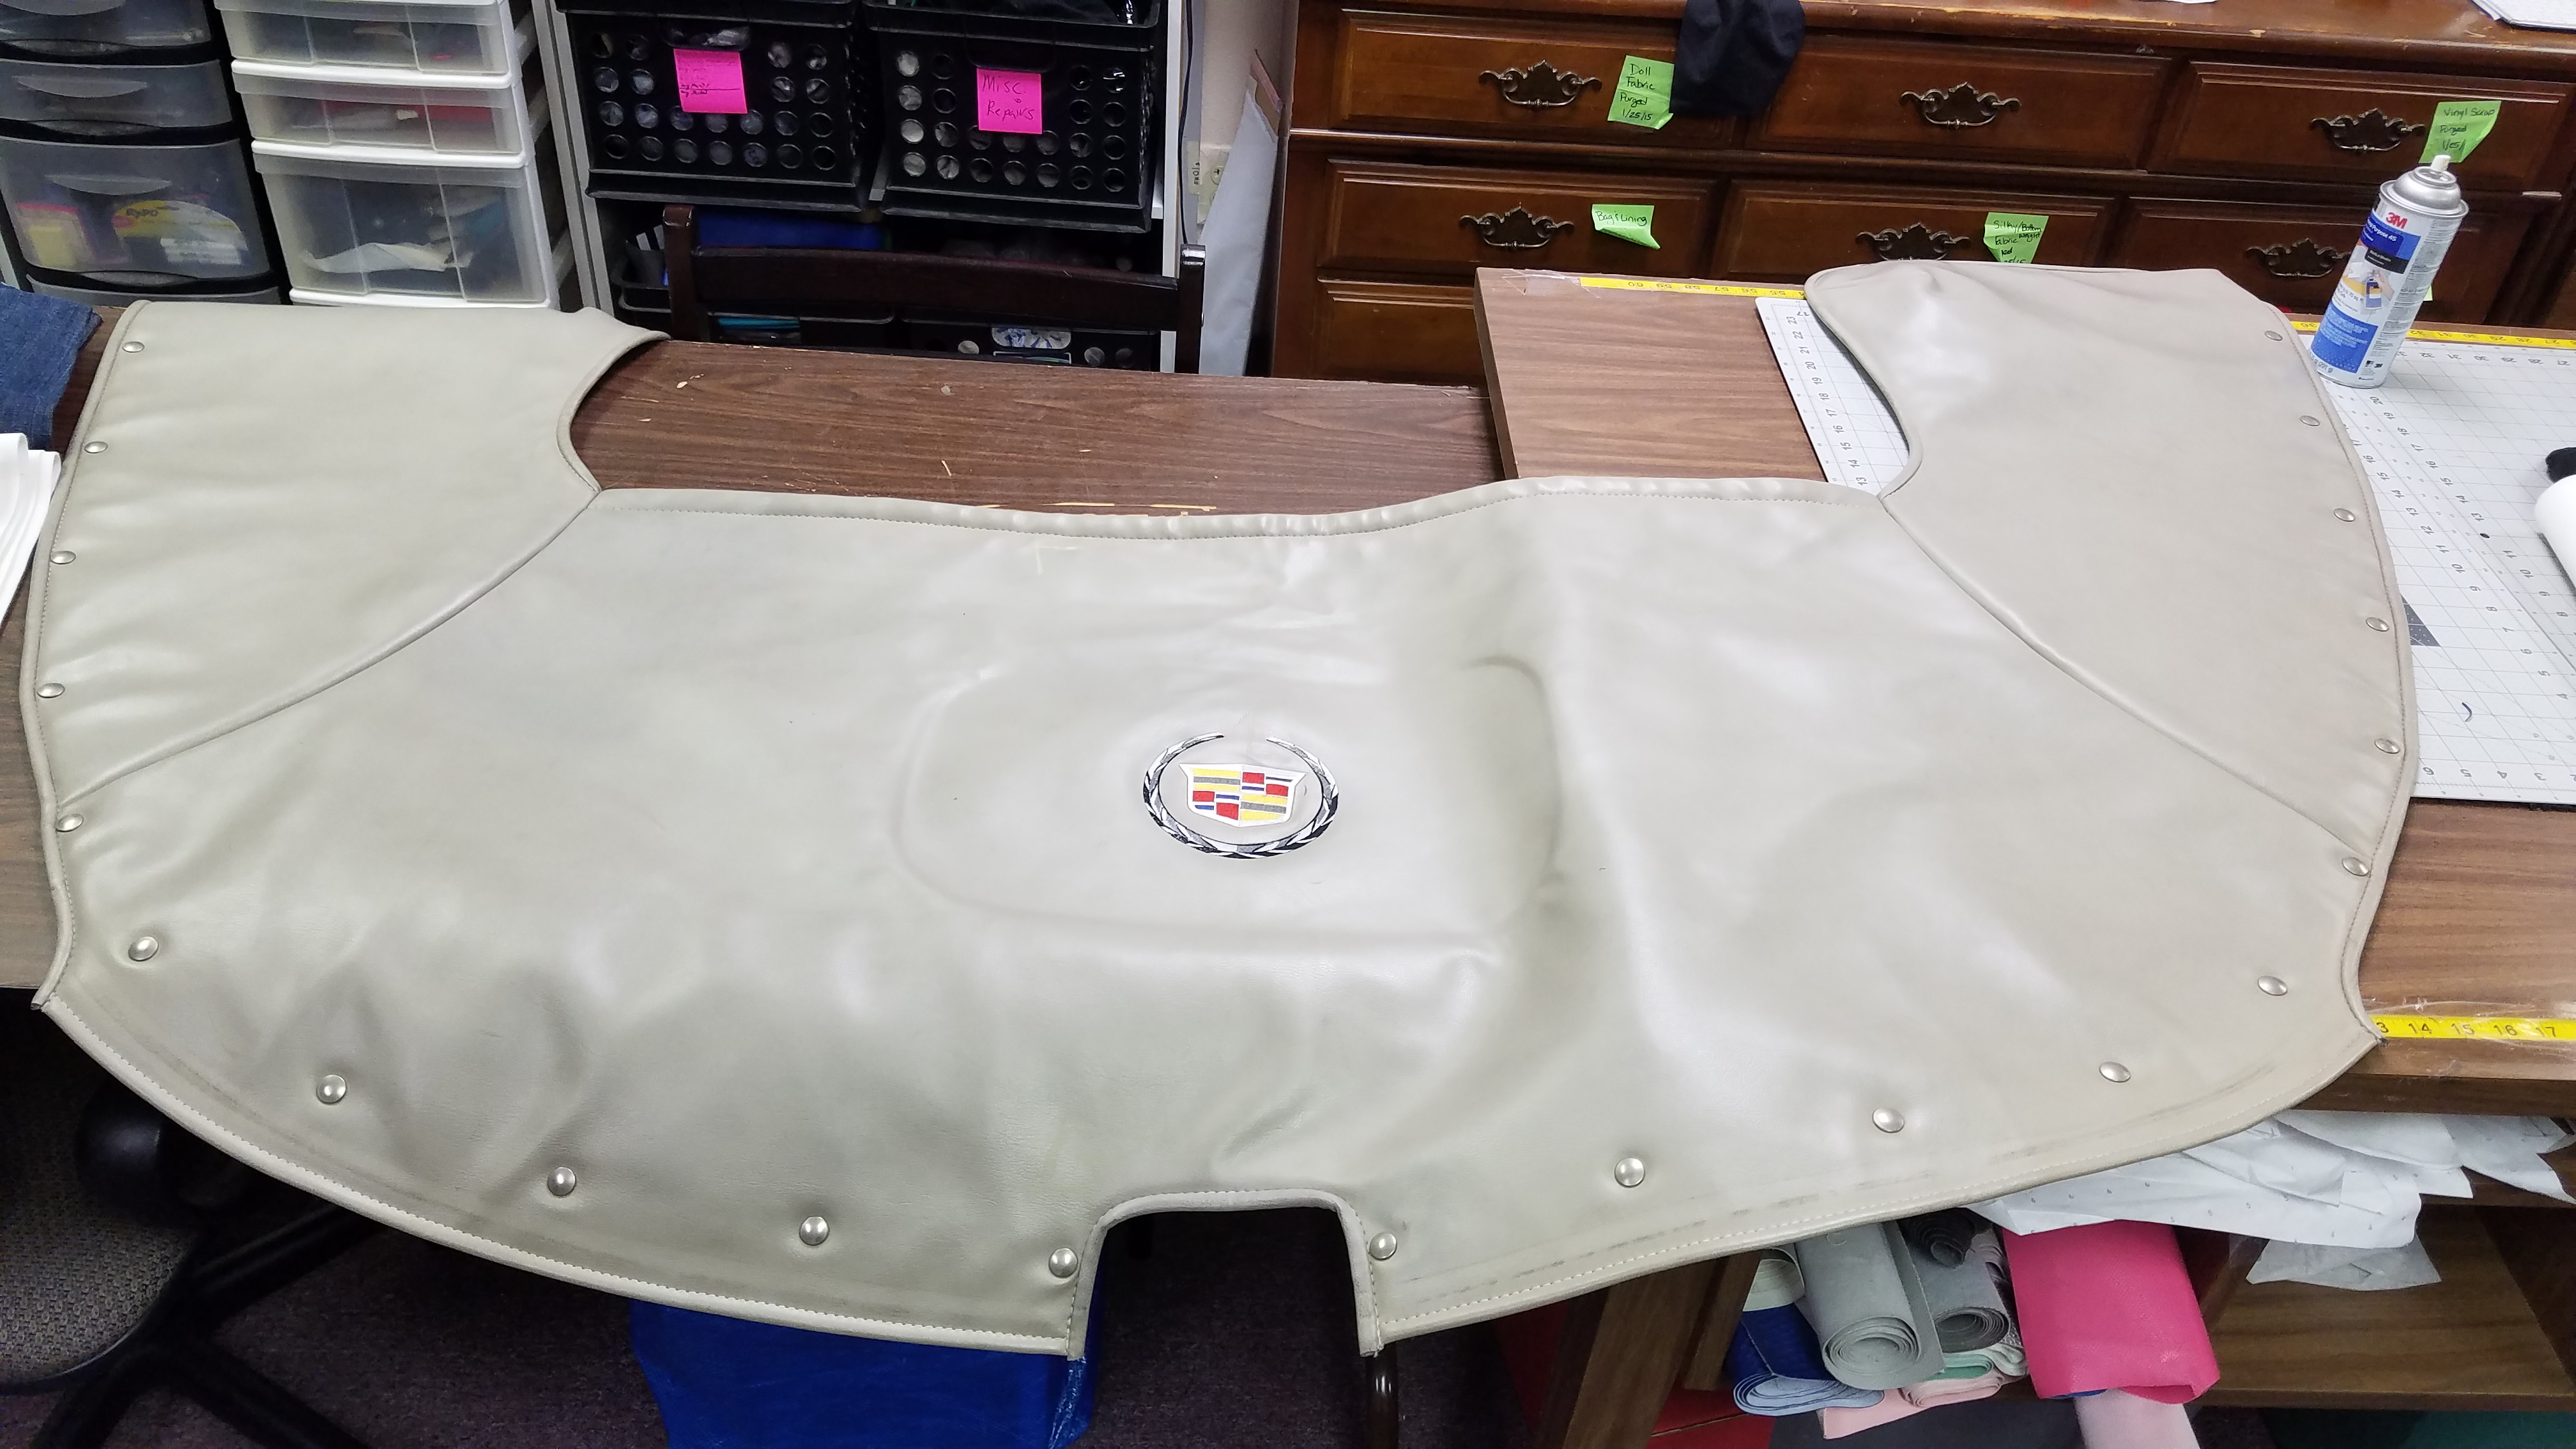
This is the set up I had to create just to be able to embroider this giant car cover thing. I raised my ironing board to it’s highest high then place my table top ironing board and my sleeve board on top of that to add extra height. Off on the right side, on top of the filing cabinet, I placed my sewing tote with my hoop master shirt board on top of that. This thing was not just large, but extremely heavy as well. If I had let it hang it would have surely broken my machine. 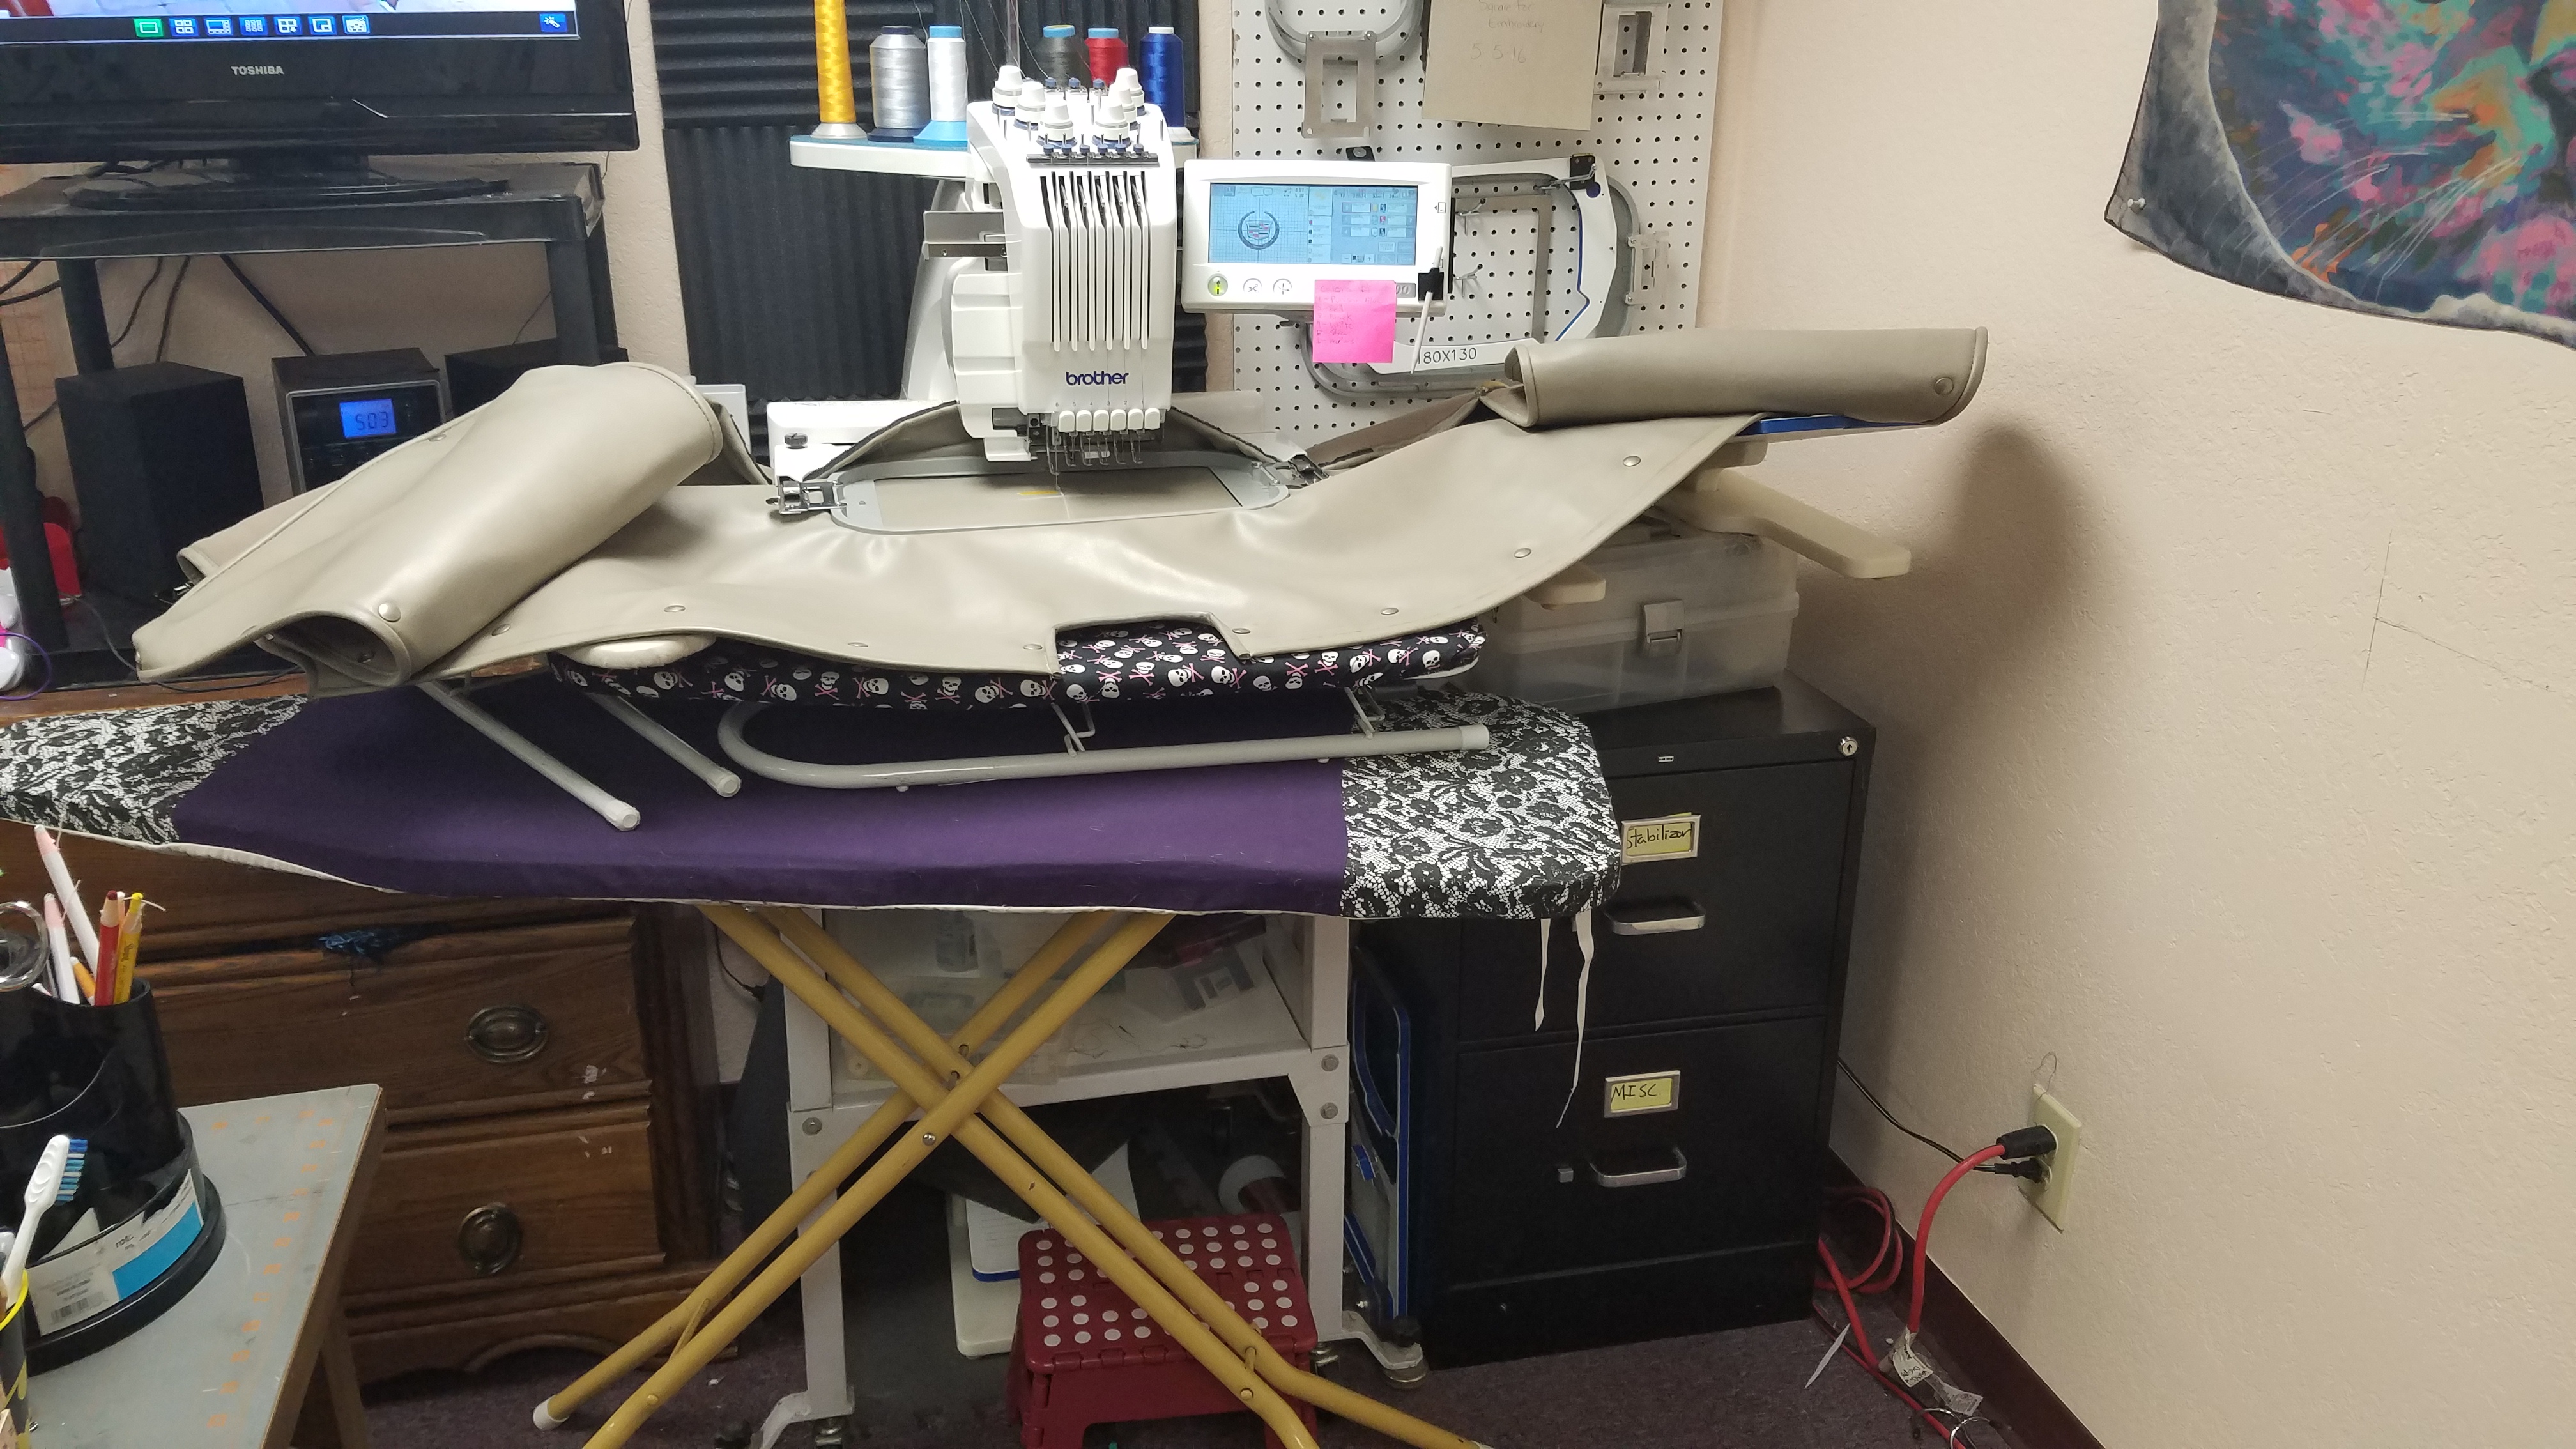


This is the amazingly complex design I had to digitize for this project. I love getting to stretch my digitizing muscle. I’ve mentioned before in past post about the digitizing process. There are not many resources for learning how to digitize embroidery and the software is extremely expensive. I’ve spent the last 6 years teaching myself through trial and error. So when I get projects like this force me to think outside the box, it helps keep my skills sharp. This design was over 30,000 stitches and had 12 color changes and 7 different colors. 
While it was stitching I had to watch it constantly for the almost two hours it took to stitch the design. This was due to both the complexity of the design and the rig I had to keep the giant piece of material in place on the machine.
There were a few things that went wrong with this design that I will change but it looks good enough that a non-embroidery person will probably not notice. The darker gray (pewter) color I chose for the outer wreath is too dark for one. If I stitch this design again I would probably use to pewter where the black is in the wreath and a medium gray for the pewter color. The wreath just feels too dark. I also accidently put the pewter over the yellow part of the center emblem instead of the black that was supposed to be there. That happened because for some reason I thought I could save myself a thread change by replacing two of my standard threads that were already on my machine. But I forgot the design required black as well as the pewter. Both the silver accent lines inside the central design and the thin black line the wraps the bottom of the central design are way too thin. These were all 0.02mm thick and they should have been at least 0.05mm. As a result, the different patches of color are showing through in some places. The most annoying thing I messed up was the stabilizing of this design. Half way through the centerpiece the whole thing started to bow really bad. I had to add two additional layers of heavy stabilizer to compensate. I forgot about the density of the design needed a very firm platform. That did the trick and the rest laid flat. However, I had to press the center with my iron. I placed it on a block of wood and used my wooden clapper to sandwich it in between too hard surfaces once heated. That allowed the fabric under the bulging piece to lay flat.

Overall, this project came out alright. It’s not my best work. Some projects are like that, they just don’t want to get made and will fight you the whole time. This project was definitely a fussy project. Everything from the embroidery file not wanting to load in the machine to the wrong thread color to the thread breaking more times than I could count and for seemingly no reason. But I made it work and I think the customer will be pleased.
